Round Robin Quilt with a twist

Over a year ago I talked my quilting buddies into a special type of round robin that I had come across on-line.  I would love to give credit where credit is due but all I know it was from a group of women somewhere in BC and because the pictures are no longer on-line I can’t even source it out anymore.

Basically, it is done as a regular round robin but instead of simply adding borders to the project that you receive, you have to follow ‘instructions’ as to what is to be done for that round – things like ” make the project neither square nor rectangular” and “cut and insert fabric 3 times”.

Sounded like a lot of fun and a great way to maybe get out of the quilting box we had put ourselves into.  I bravely (and rather naively as it turned out) offered to make up the spreadsheet for the 9 of us to follow so we would always know what instructions we were to follow and who to send the project off to when we were done.  Sounds pretty basic right?  Wrong.

This ‘challenge’ was going to take over a year to complete.  We wanted to make sure we all had enough time to do the challenge.  We all agreed our starting blocks would be something simple (mine was just a fat quarter of fabric) and not a block that we had spent hours making!  After handing out my rather spiffy looking spreadsheets to everyone my friend said “I don’t think this will work out right”.  I managed to argue loud enough that I was sure it was OK and it was left at that point.  Well, of course a couple months into it we realized that it wasn’t right.  We needed another set of instructions added to the list.  A few months later the call went out that the spreadsheet still wasn’t right because all of a sudden everyone was getting back a project that they had already worked on.  No problem, we decided, we would just carry on.  Lo and behold awhile later it was discovered that the spreadsheet was really messed up because the owners of the project would be getting their own back before it was even finished.  That really had to get fixed so I spent a long afternoon re-working the entire thing and got it straightened out enough that we could complete it.  What a nightmare!! And, that is what I’ve called my finished project.

WHAT A NIGHTMARE

Here is my finished top.  You can see the different instructions – cut 3 times – add piping – make in neither square nor rectangular and so on.

The vibrating blue in the centre was the fat quarter that I started out with.

Not really my cup of tea!  I was bound and determined I was going to quilt it though, it means a lot to me that we all had a part in it.

I started out by printing out a couple of pictures of the quilt in greyscale and started to doodle.  It finally dawned on me that if it is called What a Nightmare why not turn it into a nightmare!

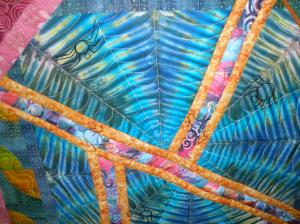
I must explain that I am terrified of spiders.  Totally.  So – if this top was going to be my nightmare then I guess I had to include a few.  The fat quarter in the centre really does lend itself to a spider web after all.

What a wicked web we weave

I used Superior Metallics in Silver for the web and King Tut Ebony for the spiders and bugs.  It was all done free hand and I went around the bugs and spiders 2 or 3 times each to give them definition and twice on the web.

AGGHHHH!

What else should be in the quilt but my version of Munch’s “Scream”  I used King Tut Limestone for the outline and So Fine! Rose Petal for the background fill around him…her…it.  I really wanted the piece to be kind of wonky and weird so all I did was sketch a rough outline of what I wanted and just played with the machine.

I even put Kilroy ( for those that remember him) in the upper right corner.

Kilroy was here

Fingers are hanging down all around the outside pink border, Red Metallics bats in the Flying Geese blocks and slithery snakes in the Drunkards path.

Slithery

All in all I had a lot of fun.  Except maybe for the spiders.

behind the scenes

It was a great chance to practice my background fills too!

Thank you to all my 4Qx2+1 quilting buddies – the spiders will only be coming out at Halloween!

A few customer quilts

Well, I’m making headway on all the customer quilts that I received after getting home from vacation.  Most of them are ‘edge to edge’ type designs and they do go fairly quickly.

simple loop meander

simple loop meander

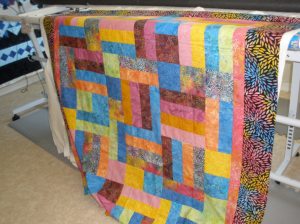
This customer just wanted a meander done – I don’t like the traditional meander where the lines never cross.  I prefer a loop meander – I find it more pleasing to look at, it makes your eyes follow around the quilt enjoying the pattern and colours whereas the standard meander makes me try and follow the line of thread much like a maze to see where it comes out!

'edgy' meander

'edgy' meander

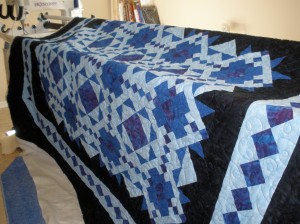
This is the same quilt pattern only much, much larger!  This was a fairly new quilter and she doesn’t ‘do’ small quilts 😉  As you can see this quilt took up most of my 12′ frame.  She also wanted just a meander but I talked her into adding a few pointy lines in the meander to keep with the sharper lines of the quilt.

edgy meander border

edgy meander border

Can’t really see it all that well but I simply threw a few points into the mix.  I used King Tut #903 Lapis Lazuli and it popped out beautifully on the dark marble print.

edge meander block

edge meander block

She seemed very pleased with the end result and that is the importing thing!  The pattern did not call for the diamond border.  She put the border together herself and added it.  I think she did a great job all-in-all and she obviously isn’t afraid to try new things 🙂

feather meander

fantasy feather

This quilt is my first ‘out of town’ customer.  OK, it is for a cousin of one of my customers but still! 😉

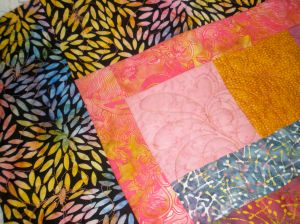
A simple large block batik that was very pretty – the colours of course don’t show up here very well.  She wanted 2 designs on this on, the Fantasy Feather in the centre and Pansy Meander in the dark border.  This quilt was nice and square so stabalizing the middle border went very quickly.  I really liked this quilt – very bright and pretty.

fantasy feather closeup

fantasy feather closeup

I used King Tut #922 Harem and it blended perfectly with just enough showing to let the feathers pop once in awhile.

pansy meander close-up

pansy meander close-up

The last picture is of the pansy meander, it should show up better if you click on the picture.

Well, that is just a few of the ones I’ve been working on.  Right now I have a custom piece I’m working on, it is for my customers grandson and is a lot of fun.  She’s used a Disney/Pixar panel and increased it with borders.  I’m doing car-themed quilting!  I will post pictures of it and my progress as I go.

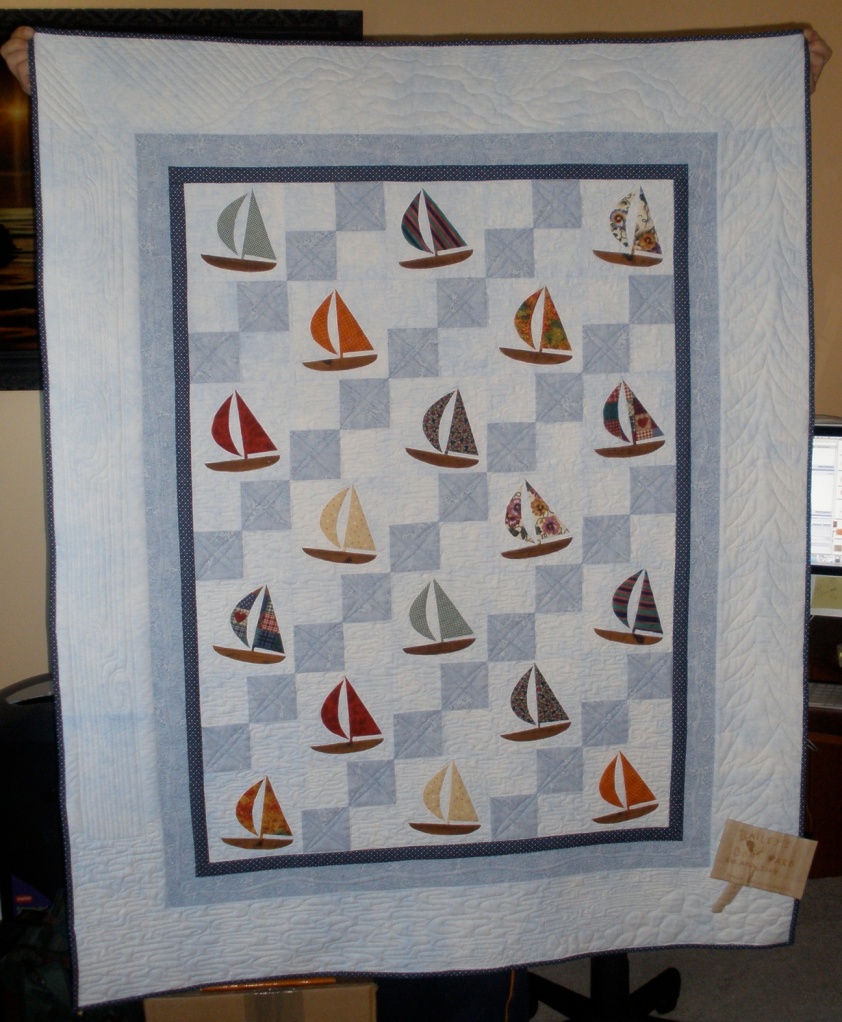
Sailboat Quilt complete

I have to tell you – the Learning Curve is the most fun ride in the amusement park!  The online class I took at MQResource was phenomenal.  Thankfully the videos will be available for some time to come and I can review.

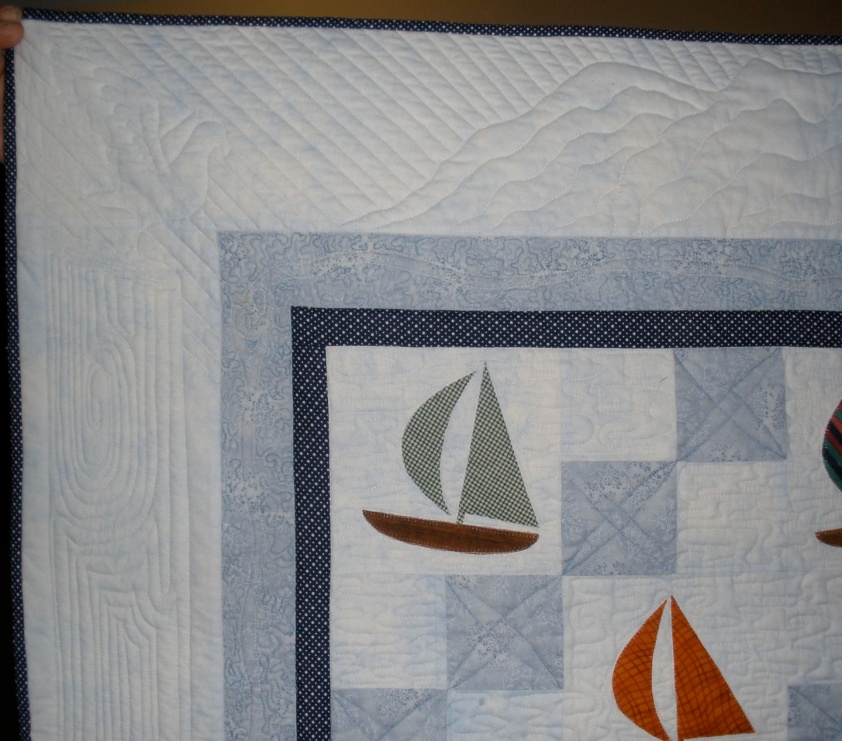
I decided on the last sketch that I did with just a few modifications.  I really liked the idea of the images of the west coast of BC surrounding the quilt and then keep with the boat theme throughout.  Here’s a picture of the finished quilt done in Superior Thread’s So Fine! for all the background and applique work; King Tut for the cable, seagull, piling, mountains and trees.  I used a matching So Fine! for all the bobbin work with not  single problem and virtually no lint issues because it is a polyester.  The only lint was from the batting!


Bailey's Boat Yard

Bailey's Boat Yard

I soaked the quilt once I had completed it to remove the chalk and pencil lines for 20 minutes in cold water and then a gentle wash in cold water with a light spin.  The un-quilted top was 48 x 60 but after I washed it it was only about 45″ x 55″!  These fabrics were pre-washed but I did not pre-wash the batting.  The batting I used was Bamboo, I believe it is 50-50 bamboo/cotton mix, and will shrink about 1-3%so that wouldn’t account for the discrepancy in size.  A great deal of the shrinkage is due to the quilting itself and is something that quilters should keep in mind if they have a specific size they need the completed top to be.  Another issue was the density of the quilting had caused a slight wave to the side and bottom borders.  In the class a few members talked about blocking the quilts and different tips on getting rid of wavy borders after quilting.  Now, I have blocked knitted items and doilies but never a quilt!

My husband helped me and it took us over an hour to square up and block the quilt.  It made an amazing difference!  We were able to get it back to 46.5″ x 59″ and it took out 99.9% of the fullness along the bottom and that is easily solved with a second sleeve and pole when it is hanging on the wall.  Personally – I think that a slight wave to a hung quilt looks normal – it is fabric after all!  I don’t know that I would ever block a bed quilt unless it was going into a juried show but I wont hesitate to block a wall quilt again.

Here’s a close-up of the seagull and top of the piling he is resting on.  Please note that I decided to use 2 layers of bamboo batting to make sure to get lots of “puff”!


Bailey's Boat Yard - seagull

Bailey's Boat Yard - seagull

Notice the quilting in the medium blue blocks?  Know what quilting block that is??  First person to comment on what that quilt pattern is will get a special little gift from Baileys Quilting Headquarters – just because you’re paying attention 🙂  I was able to do four rows down and then back up again in a continuous line but the crossed design was a start and stop each block!  

I decided not to do the chains in the middle border – they would have to be done free hand and I knew that I was not at the skill level to do that nor did I have any templates that would work.  I decided to free-hand a cable with interlocking ends instead.  Micro-stippling around to make it pop out.


Bailey's Boat Yard micro&cable

Bailey's Boat Yard micro&cable

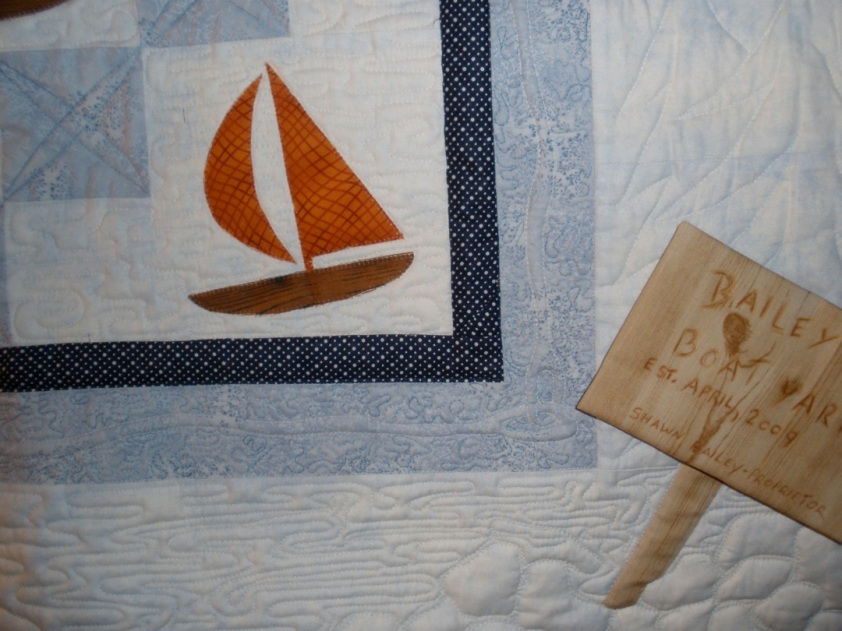
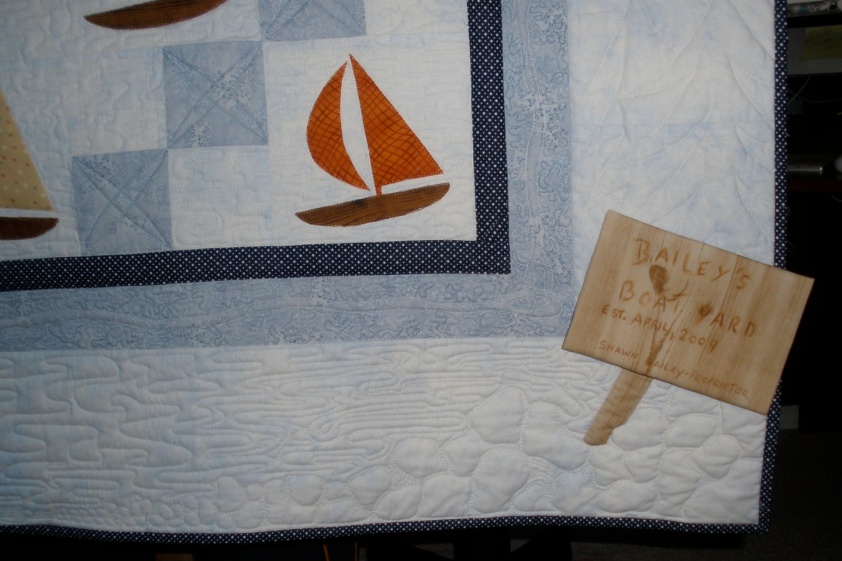
I had to admit I am remiss at making labels for my quilts these past few years.  I decided to have a bit of fun with this one.  I appliqued the post of the sign right to the quilt and then I wrapped the same woodgrain fabric around a rectangle of craft foam.  I used water soluble pencil crayons to write the sign/label.  Here’s a close-up of the label/sign stuck in the rocky shore at the trees edge.


Bailey's Boat yard label

Bailey's Boat yard label

This is definitely not the type of quilting that one would make money on – not unless one was world renowned!  I didn’t take note of the hours spent but I would hazard a guess it was at least 36 or more.  Of course that includes all the frogging (ripping out), starting and stopping and burying the threads!

Don’t forget the give-away, take a look at the medium blue blocks and comment as to what quilt block the actual quilting design looks like – first one wins a prize 😉

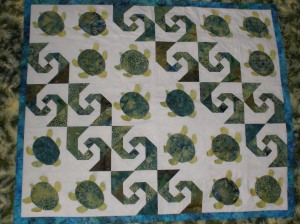
Baby Honu quilt finished

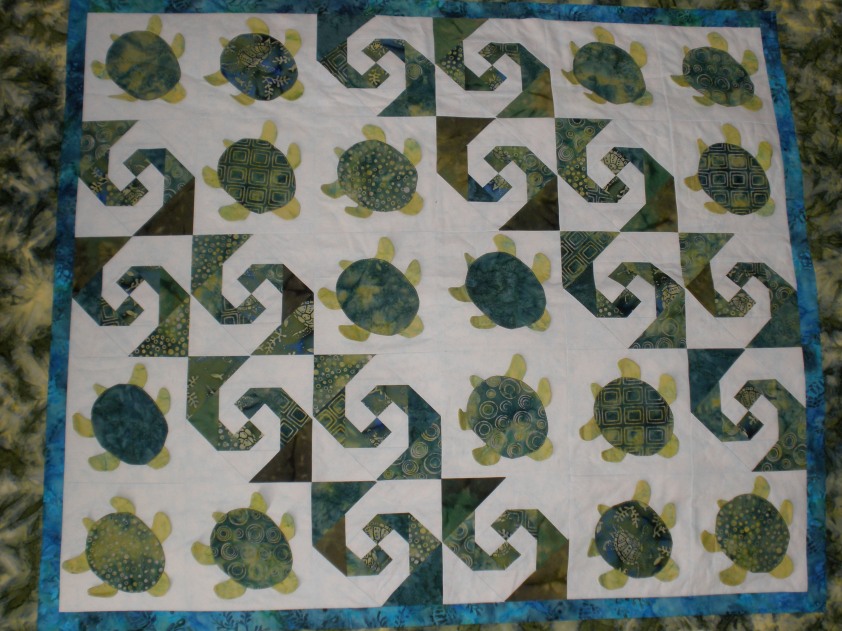
As promised – here are the quilting designs I used for the quilt.  Here are the before and after of the complete top –


Baby Honu quilt. Pattern by Lisa Boyer

Baby Honu quilt. Pattern by Lisa Boyer


Baby Honu quilt finished

Baby Honu quilt finished


The finished picture was taken at a bit of an angle – the quilt really is straight!

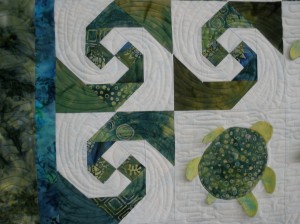
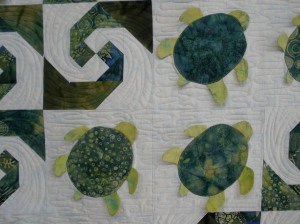
The water meander really makes the turtles look like they are marching across the quilt.  I’m glad I did the swirls in the snails trail blocks as it gives great movement to the quilting.  I used a small multi-use template for the curves but made each once different because so are ocean waves!


Baby Honu, waves

Baby Honu, waves

Baby Honu water meander

Baby Honu water meander

I tried to match up the water meander to the waves, not always successfully 🙂


The water meander as a background fill really makes the legs, tail and head pop away from the quilt casting shadows and giving even more dimension to the quilt.

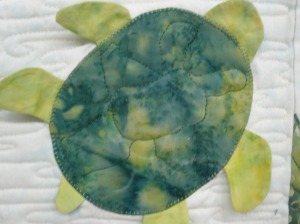
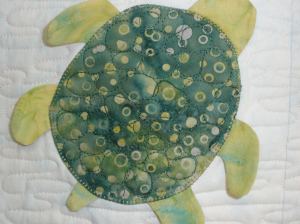
Each turtle was quilted based on the fabric.  The mottled fabric was quilted in a turtle shell type of design, the small circle fabric had pebbles and so on.


Turtle shell design 1

Turtle shell design 1


Turtle shell design 2

Turtle shell design 2


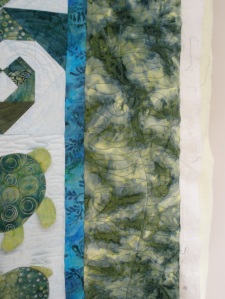
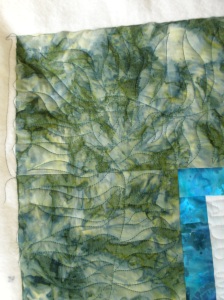
The border was done much the same way as a feather border would be only I made seaweed instead.  I used chalk and marked the ‘corner blocks’ of the border to start.  I didn’t use the blocks themselves to divide up the length of border as they were too small, I simply chose a size pleasing to the eye.  The border width is then divided into thirds.  The wavy stem for the seaweed is chalked in the middle section.  Sounds pretty confusing – I think I’ll do a tutorial on how to mark this type of border!  The seaweed is very simple, just spaced ‘flames’ for the leaves with the odd little tendril placed to even out the leaves and get them pointed in the right direction again. 


Seaweed border

Seaweed border

Seaweed border, corner

Seaweed border, corner

I like how this quilt has turned out, hopefully, so will my customer!

Baby Honu quilt

I’ve just started another customer quilt.  She made the adorable Baby Honu quilt by Lisa Boyer.  Here’s a picture of my customers quilt.

Baby Honu quilt. Pattern by Lisa Boyer

Baby Honu quilt. Pattern by Lisa Boyer

Beautiful sea green batiks and the turtles are swimming on a very pale blue background.  We’ve chosen King Tut #971 White Linen for the pale blue background.  I really wanted the quilting to just compliment the quilt and not become a focal point so that was the best choice.  I’m doing what I call a water meander behind the turtles.  The Snail Trail blocks reminded the customer of waves so I’m doing a swirl into them up to the point.  All the green areas are done in King Tut #989 Malachite  and it is blending perfectly.  The outer border is 7″ wide and I’m doing a wavy seaweed pattern all around.  Once I’ve got a bit more quilting done I will post pictures.  The background water meander fill is allowing the loose parts of the turtle (feet, head and tail) to stand out and cast shadows – very nice!